| |
For
purposes of this tutorial, we are using framing stock that
comes in 6' lengths, is available in 1", 2" and
3" widths. The stock has shaped edges on the front.
It is also routed out to a width of 1/4" and depth
of 1/2" to accept 1/2" U zinc border came or 1/2"
HF lead.
Initially
we sand the framing stock with 220 grit sandpaper then wipe
it down with a damp cloth to remove any residual dust from
the surface. |
 |
Next
we screw a cup hook into one end so we can hang the stock
while applying a finish to it. |
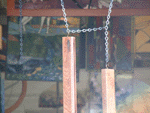 |
A
close up of the cup hooks. |
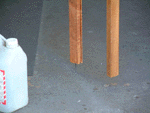 |
We
also place a 3" screw about 1/4" into the wood on
the bottom of the stock piece. This gives us something to
hold onto when applying stain or a finishing polyurethane.
By holding the screw on the bottom of the stock we can avoid
drips and marking the finish while applying it. |
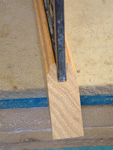 |
With
the procedure we use, the panel is kept in an upright position
while custom sizing the frame. Two people are needed for the
fitting and assembly.
Miter one end of the stock, lay
it on a work table and fit the frame into the stock leaving
a space of about 1/16" ~ 1/32" from the
edge of the zinc border to the end of the channel in the
stock as shown. |
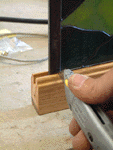 |
Move
to the other end of the stock piece and mark the wood about
3/16" back from the inside edge of the zinc. When cutting
this miter (45 degree angle) hold the piece you want to keep
for the frame in your left hand, the handle of the saw in
your right hand, and be sure the edge of the cutting blade
is set on the outside side of the mark. If you cut on, or
on the inside of the mark the piece will be too short to fit.
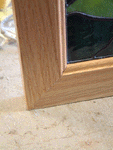
Fit the cut length to the bottom
of the panel. Both ends should appear as above with a space
of about 1/16" ~ 1/32" of the channel showing.
If the cut is too long, then carefully trim a little of
the end with the saw and refit. Better to make several fits
than cut too much off. Exercise care. |
 |
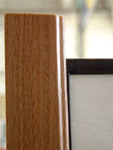
Miter
the corner of the next piece of stock and fit to the panel
as shown. |
 |
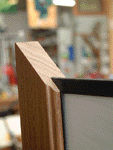
Go
to the top of the first vertical and mark as you did on the
end of the bottom. Remove the stock and cut.
The vertical in this picture is
marked, lightly. Click on the picture to see it more clearly. |
 |
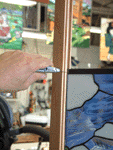
Again,
fit and adjust the stock so that the end of the bottom of
the channel in the stock has a 1/16" ~ 1/32" overage. |
 |
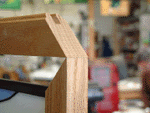
Carefully
turn the panel 180 degrees so you can continue working in
the same position on the second vertical. Miter the stock
for the second vertical and mark for the cut.
Cut and fit as you did the first
vertical. |
 |
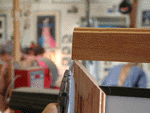
Now
that the bottom and two verticals are cut and fit, miter the
end of the top stock piece and lay it upside down on top spanning
the two verticals. |
 |
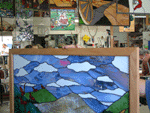
Go
to the other end of the top stock piece, visually check that
the vertical pieces are positioned on the frame correctly.
This is easy to do by making sure the edges of the zinc border
are even with the edges of the framing stock and that the
bottom miters are fit on.
Mark the top to cut exactly where
the point of the vertical meets the top piece of stock as
shown. |
 |
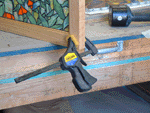
Make
your cut. Turn the stock to the fitting orientation and fit
to the panel. By turning the top stock upside down for marking,
you perfectly align the ends to the verticals. Should be a
perfect fit. |
 |
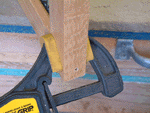
Align
a bottom corner and hold the mitered joint in position with
a wood clamp. When aligning the mitered corner, make sure
the tip of the vertical is extended so it is 1/16" past/longer
than the tip of the horizontal stock. |
 |
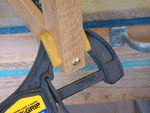
Drill
an appropriate sized hole at an appropriate height, depending
on the type of stock and framing screws being use. To help
make the frame you are building stronger, drill screw holes
in from the sides and not the top or bottom. Having the screws
come in from the side helps keep the weight of the panel from
eventually pulling them out by gravity. |
 |
Apply
wood glue to both faces of the miter and allow to become tacky.
Screw screw (screw screw sounds
screwy, but what the heck....) into the frame. When approaching
the point where the head of the screw will begin to flush
up against the wood, screw slowly and carefully. As the
screw begins to pull the two pieces of stock together, the
bottom stock will begin to slide against the vertical. Tighten
screw until the two stock tips that were skewed come into
even alignment. If you tighten too much the tip of the bottom
piece of stock will be pulled out past the tip of the vertical. |
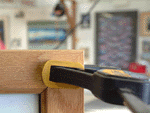 |
Here
is another picture of the slightly off center corner before
hole drilling. Notice how the tip of the vertical wood stock
is ever so slightly higher than the horizontal tip.
Finish screwing all four corners
together. |
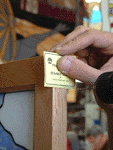 |
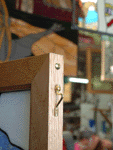
We
use our own brass framing hooks (bent or rolled). We
also use our own brass framing screws. To position the hanging
hooks we take the paper label off the hook package, align
the top end with the corner of the frame and drill a small
pilot hole at the bottom edge of the tab. |
 |
Next
place the top of the hook over the hole and screw the screw
provided halfway in so the hook still hangs free.
Position the hook and screw a pilot
hole through the bottom of the hook. Screw in the bottom
screw, then tighten the top screw. Repeat procedure on the
other side. |
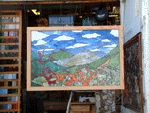 |
Your
panel is now framed and ready to be hung. |


